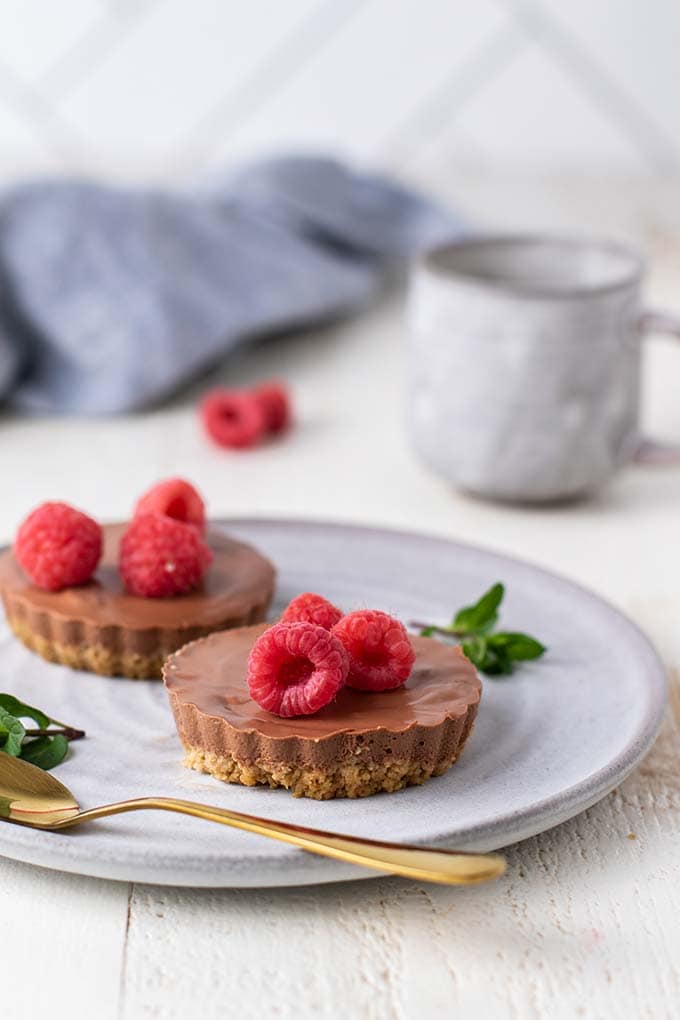
Cute dessert alert! Your party guests will love these individual-sized Chocolate Cheesecakes. I use gluten-free graham crackers, and lighten up a classic cheesecake recipe with Greek yogurt.
Contents
A Perfect Party Dessert – Greek Yogurt Cheesecake
Parties and gatherings might look different this year, but despite continued social distancing, I am sure we are all getting ready for some small but meaningful gatherings!
These mini chocolate cheesecakes are a great individually portioned dessert. They look stunning on a platter, and are just so delicious!
You’ll LOVE this recipe because:
- The rich chocolate cheesecake has a light, but ultra-creamy texture, thanks to the addition of Greek yogurt. This also brightens up the typical sweetness of cheesecake, making it a great summery dessert option.
- It’s naturally sweetened with maple syrup – just enough without going overboard on added sugars!
- The base is just 2 ingredients — gluten-free graham crackers and butter. It takes minutes to put together!
- They are stunning served with fresh berries and mint. I went with raspberries, but strawberries, blackberries, or banana slices would be equally as good!
How to Make Mini Chocolate Cheesecakes
I use this silicone mold, which makes 12 perfect sized cheesecakes. The mold can also be used for homemade nut/seed butter cups, so it’s one you’ll likely get a lot of use out of! If you don’t have this pan, use a muffin tin lined with parchment paper liners.
Step 1: Prep the crust by adding gluten-free graham crackers to a food processor and forming a crumb. Then, add melted butter and pulse to combine into a crumbly mixture.
Step 2: Scoop 1 heaping tablespoon of the graham cracker crust into each cavity.
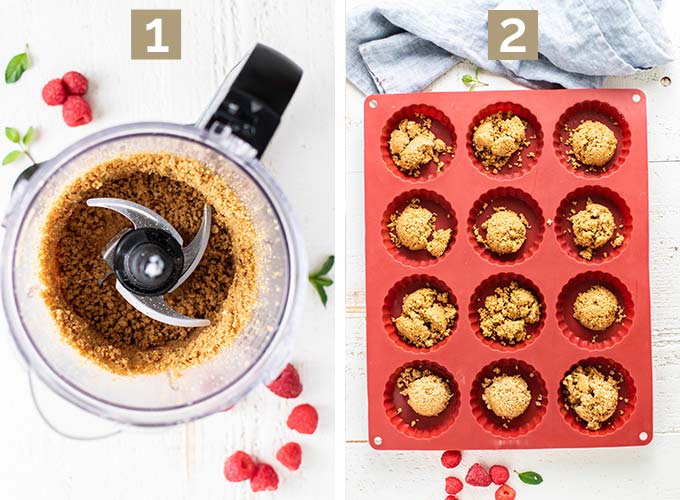
Step 3: Use slightly wet fingers to press the crust down into each hole. I find this easier to do using the bottom of a glass ramekin about this size. Maybe the bottom of a pint glass would work too?
Step 4: Prepare the chocolate cheesecake mixture by first softening the cream cheese in the food processor, scraping down the sides as necessary, to lighten up the cream cheese so it mixes well into the other ingredients. Add the rest of the ingredients, and process to combine, stopping to scrape a few times. Try not to let it process for too long, because you don’t want air bubbles on the tops of your cheesecakes!
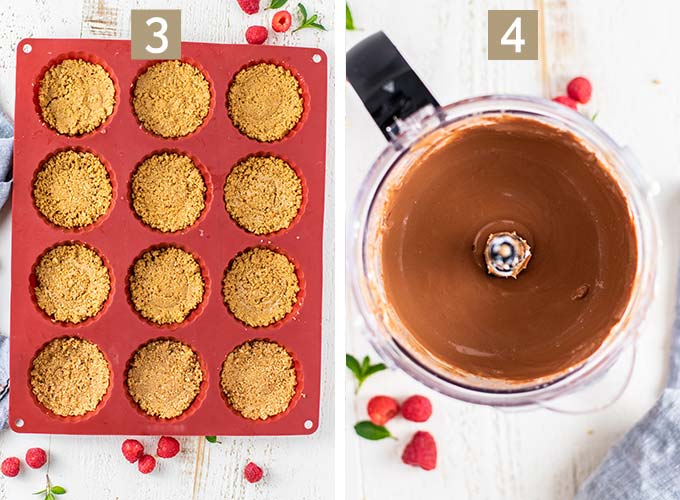
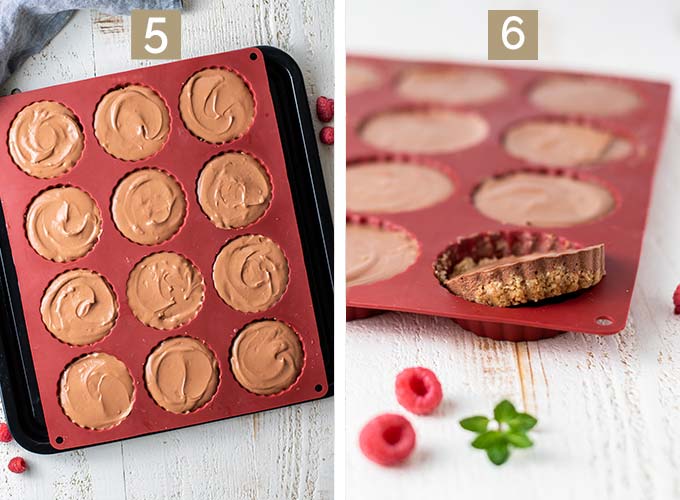
Step 5: Divide the chocolate cheesecake batter equally between the 12 mini cheesecakes. Loosely cover the pan with foil.
Step 6: Place foil over the pan, tenting it so they steam and don’t dry out while baking. The cheesecakes bake low for 1 hour. They need to fully chill in the refrigerator (about 3 hours) prior to pulling them out of the pan.
How to Top Mini Chocolate Greek Yogurt Cheesecake
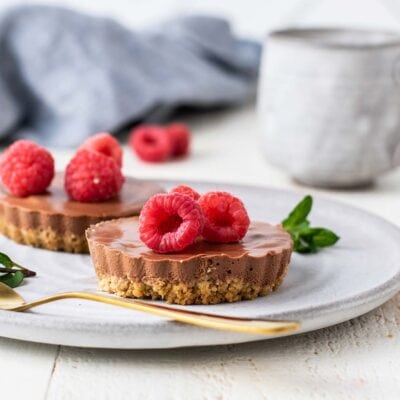
These cheesecakes are a gorgeous dessert all on their own. Definitely try them with raspberries on top!
If you want to get a little more creative, I suggest:
- A dollop of whipped cream or coconut whipped cream
- A spoonful of Raspberry Chia Jam
- Mixed berries — add blackberries, blueberries, and sliced strawberries.
- Chopped and toasted pecans
- Toasted coconut flakes
Other Delicious Cheesecake Recipes:
- Lemon Cheesecake, by Sunkissed Kitchen
- Vanilla Bean Greek Yogurt Cheesecake, by Sunkissed Kitchen
- Greek Yogurt Pumpkin Cheesecake, by Sunkissed Kitchen
I’d love to connect with you on social media! Find me on Facebook or Instagram where I post daily healthy eating and lifestyle inspiration!
Mini Chocolate Cheesecakes
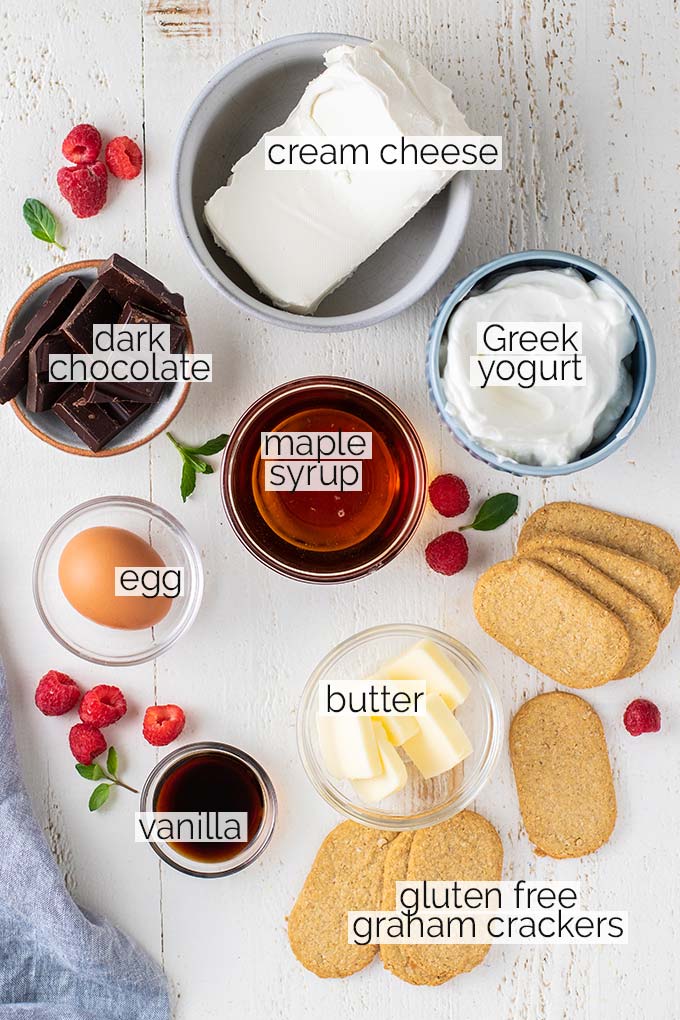
Ingredients
Graham Cracker Crust
- 240 grams gluten free graham crackers or sub regular graham crackers
- 5 tablespoons butter melted
Chocolate Greek Yogurt Cheesecake
- 8 ounces cream cheese full fat
- 1 cup Greek yogurt full fat
- 6 tablespoons maple syrup
- 3 ounces unsweetened baking chocolate melted
- 2 teaspoons vanilla
- 1 egg
Instructions
Graham Cracker Crust
- Preheat oven to Bake at 350º F.
- Prepare the crust by adding the graham crackers into a food processor, and processing until crumbs form. Add the melted butter, and pulse a few times until combined. Press the graham cracker mixture into each of the 12 holes in a mini cheesecake pan. If you're making these in a muffin tin, line each cavity with a parchment liner, and then add 1 1/2 tablespoons to the bottom of each. This will make more like 16 mini cheesecakes if they are made in a muffin pan.
- Bake the graham cracker crusts for 12 minutes. Allow them to cool before filling them with the cheesecake mixture.
Chocolate Greek Yogurt Cheesecake
- Reduce oven temperature to 275º F.
- Rinse out the food processor bowl, and add the cream cheese. Process to soften the cream cheese, stopping to scrape down the sides if necessary.
- Add the Greek yogurt, melted chocolate, maple syrup, and vanilla. Process until mixed very well. Scrape down the sides as necessary to completely mix into the cream cheese.
- Add the egg, and process again to mix well.
- Fill each crust with about 3 tablespoons of the cheesecake mixture, or until just at the tops of the pan.
- Cover the cheesecakes with foil, tenting it so the cheesecake doesn't stick, and bake on 275º for 1 hour.
- Once the cheesecakes are finished baking, allow to cool, and then allow to set for at least 3 hours in the refrigerator.
- Serve the cheesecake with berries or whipped cream.
- Store the cheesecake in the refrigerator for up to 5 days. This cheesecake recipe also freezes well. Wrap tightly, and then store in the freezer for up to 3 months.
Leave a Reply