This Ninja Creami Protein Ice Cream is the best summer healthy eating hack! Made with nutritious ingredients, no added sugar, packs in 60 grams of protein per pint, and is only 320 calories. Add mix-ins and toppings to make it your perfect ice cream flavor.
Contents
The Perfect Protein Ice Cream
Move over protein shake, protein ice cream is WAY more satisfying! It’s the PERFECT way to hit your protein goals while satisfying your sweet tooth.
I bought a Ninja Creami a few months back with the intention of making healthier homemade ice cream for my son. He’s a picky eater and it’s hard to sneak supplements and protein into his food.
That plan backfired – he just doesn’t trust me not to “hide” things in homemade foods!
But no worries, this machine is not going to waste. I have been experimenting and have come up with the BEST flavors of protein ice cream.
If you’re tired of boring protein shakes, this Creami Protein Ice Cream Recipe has as much protein and your typical shake or smoothie, has no sugar, and only 8 grams of carbs. A whole pint is only 320 calories!
At first I was unsure that I could use low calorie, low carb bases, like almond milk and Greek yogurt, and still get a creamy ice cream. Happily, I was proven wrong! This recipe comes out creamy and smooth, with a thick gelato-like texture.
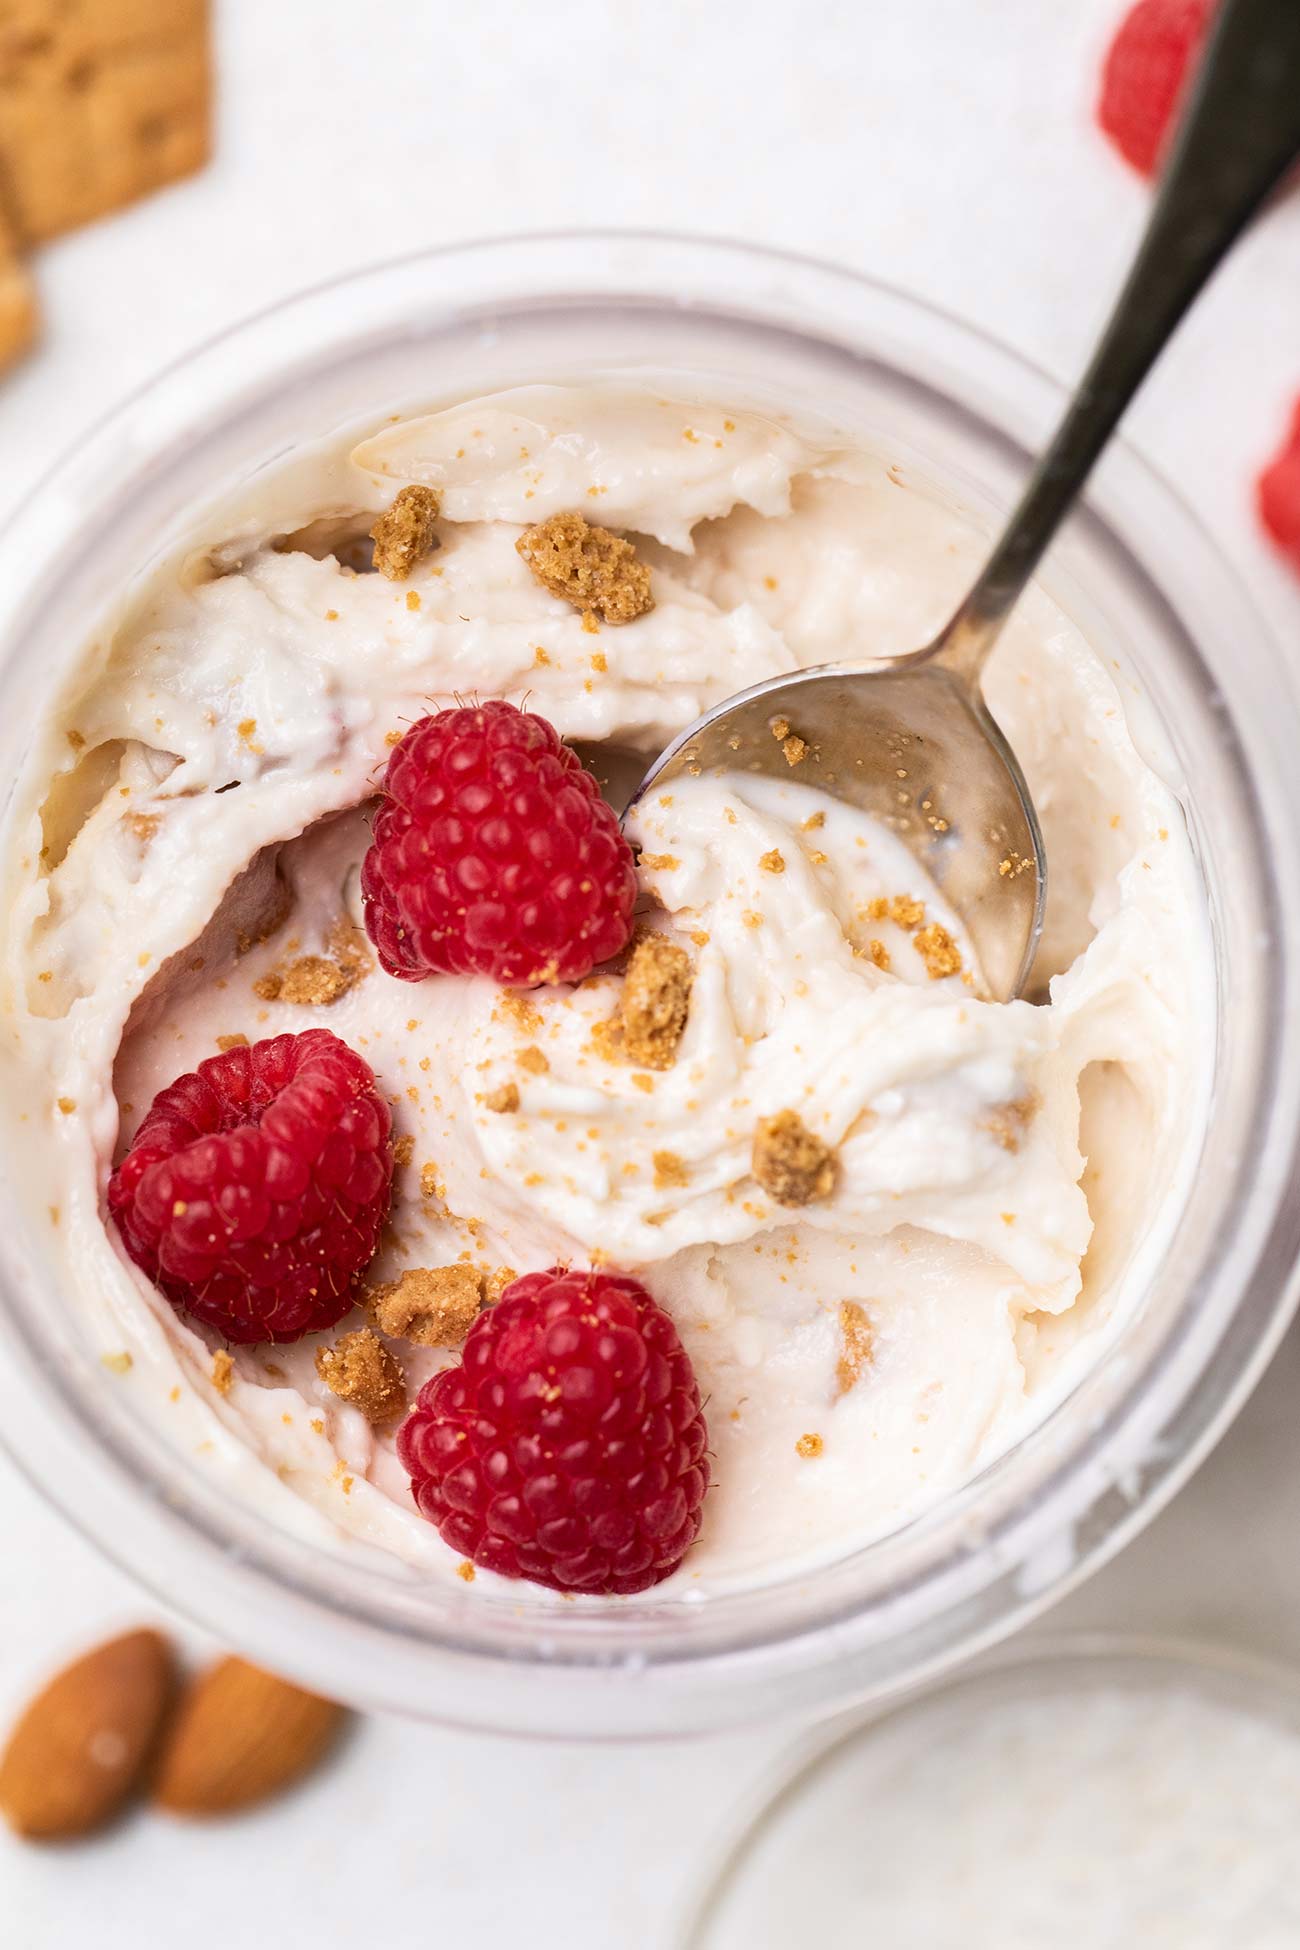
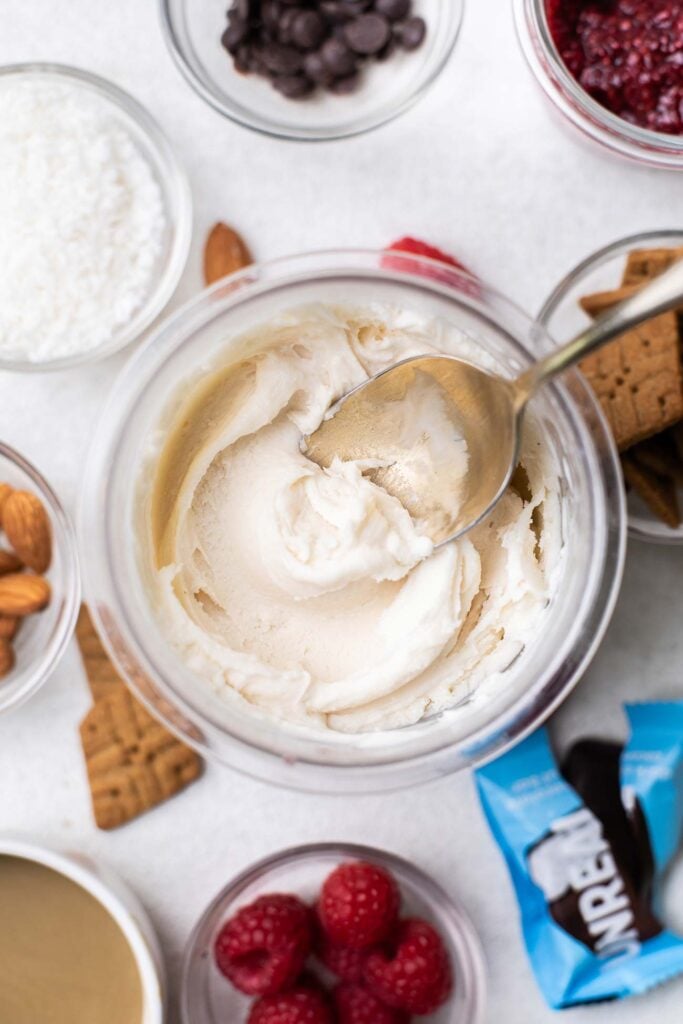
Keep it plain and simple vanilla, or add mix-ins and toppings to create fun flavors!
Lots of Creami recipes out there rely on pudding mix, xanthan gum or guar gum for a thicker or creamier texture – I am happy to report that you do not need them!
What You’ll Need
First things first, you’ll need a Ninja Creami Ice Cream Maker.
Vanilla Protein Ice Cream
- Greek Yogurt (I use 2% and love how creamy and this Fage is. Cottage cheese works here too!).
- Almond Milk (unsweetened, or use any milk here such as whole milk, Fairlife milk, coconut milk, oat milk, or cashew milk)
- Allulose Sweetener (this is the healthiest choice and also gives the ice cream a thicker texture than other sweeteners. If your protein powder is sweetened, you can skip this or lessen the amount. Use honey, maple syrup, or date syrup if you don’t want to keep this sugar free.)
- Cashew Butter (optional, a little nut butter gives it a creamier texture!)
- Vanilla Extract
- Whey Protein Powder (I use this unflavored, unsweetened grass-fed whey. It has an amazing flavor and also gives smoothies and this protein ice cream a great texture.)
- Collagen Protein (optional but a great way to work it in to your day!)
Mix Ins & Toppings
The Creami has a great “mix-in” feature. There are some additions that are great to use here (think solid items with no water content) and others that are better used as toppings (things that have water or aren’t solid).
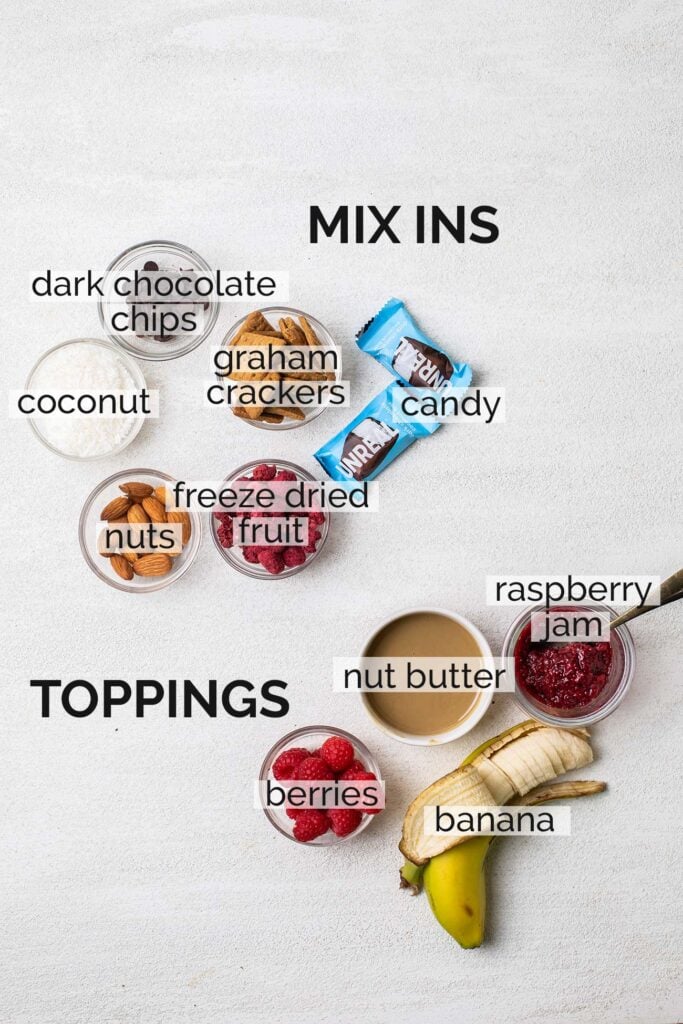
Mix-In Suggestions
- Nuts or Seeds (pecans, walnuts, almonds, macadamia nuts, pistachios, sunflower seeds, pumpkin seeds, etc.)
- Coconut
- Freeze Dried Fruit (raspberries are awesome in this vanilla protein ice cream recipe!)
- Graham Crackers (I use Simple Mills Sweet Thins for a gluten free and grain free option.)
- Dark Chocolate Chips (use mini chocolate chips, or better yet, make your own with cacao powder, coconut oil, allulose and nut butter. Adding nut butter and coconut oil makes it softer when frozen, similar to the chocolate pieces in regular ice cream.)
- Candy (like chocolate pieces, chopped candy bars, etc. The Unreal coconut bars or “M&M” type candies are awesome!)
Topping Suggestions
- Raspberry Chia Jam
- Nut Butters (thinned with a little melted coconut oil makes them harden like a magic shell!)
- Healthy Hot Fudge
- Fresh Fruit (do not “mix-in” with the machine – it will release the water and result in overly soft ice cream).
How to Make Ninja Creami Protein Ice Cream
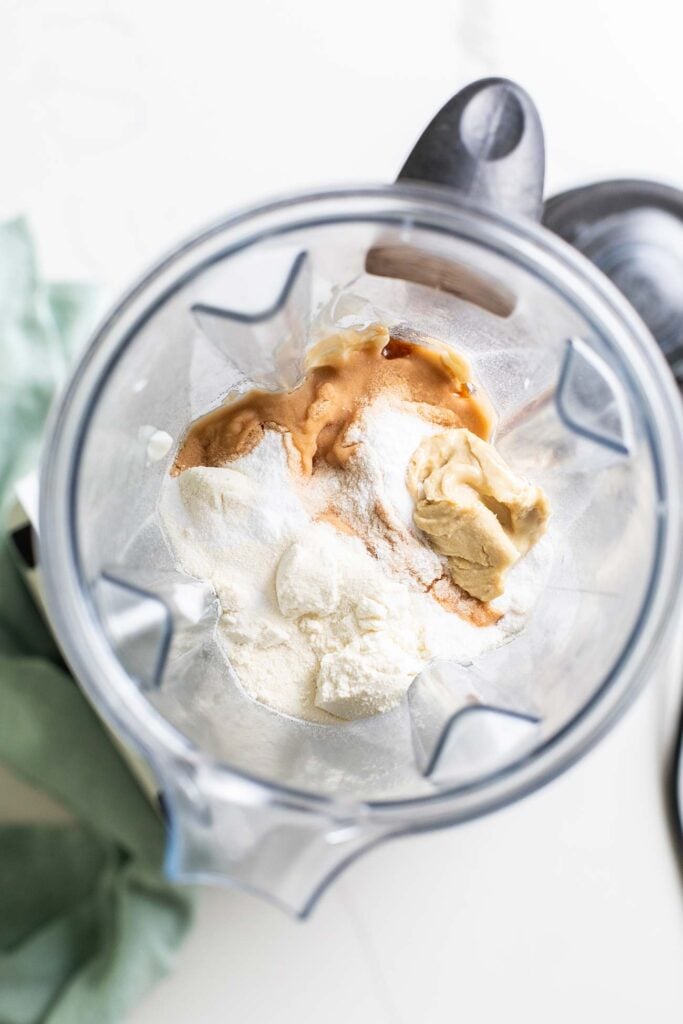
Step 1: Add all the ingredients into a blender, and process until the yogurt, cashew butter, and protein powders are fully incorporated. (Or put the ingredients into the pints and use an immersion blender.)
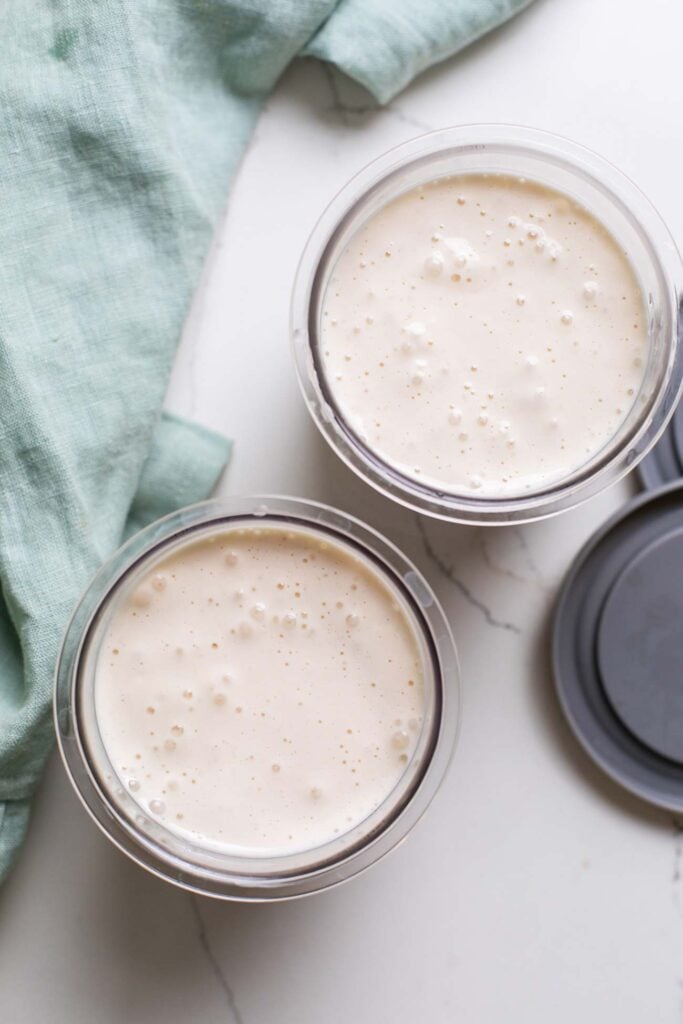
Step 2: Divide the ice cream mixture between two Ninja Creami Pint containers. Add the lid and freeze the pints on a level surface overnight. They may seem to be ready after 6-8 hours, but if you’d like a firmer textured ice cream (as opposed to a smoothie or milkshake texture), it really needs to fully freeze.
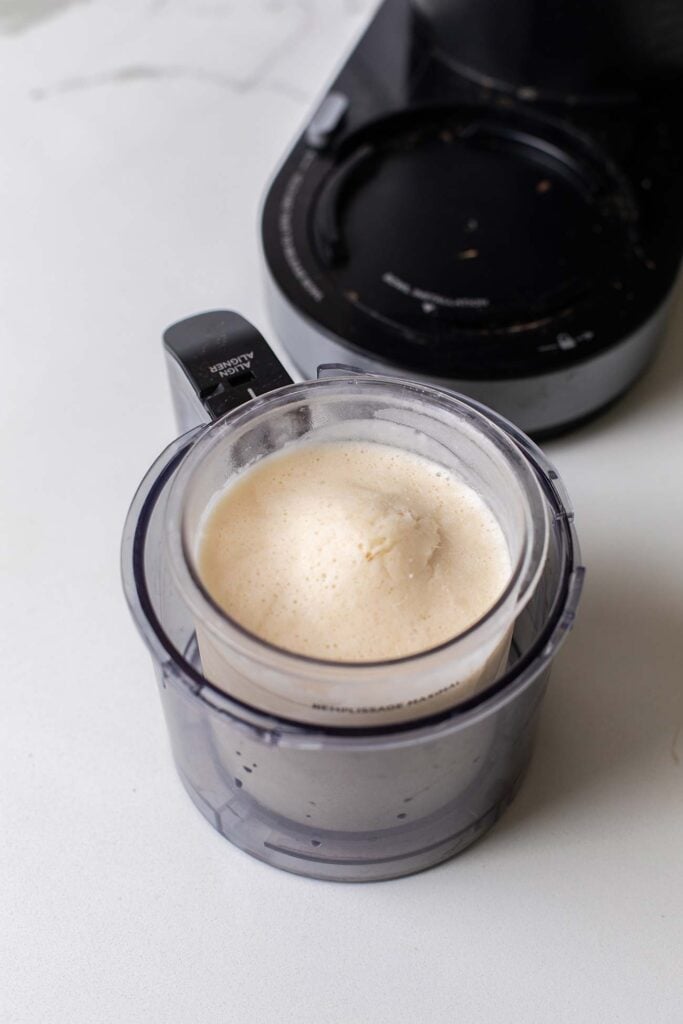
Step 3: Run the frozen pint under hot water for about 15 seconds. This melts the outer layer so it gets creamy and doesn’t leave a frosty layer around the edges of the pint.
Add the pint container to the Ninja Creami outer bowl, and securely attach the Outer Bowl Lid with the Creamerizer Paddle. Turn the machine and set to “Lite Ice Cream.” If after running the ice cream looks icy/dry, do not run a full “Light Ice Cream” cycle again – instead, run it again with the “Respin” feature.
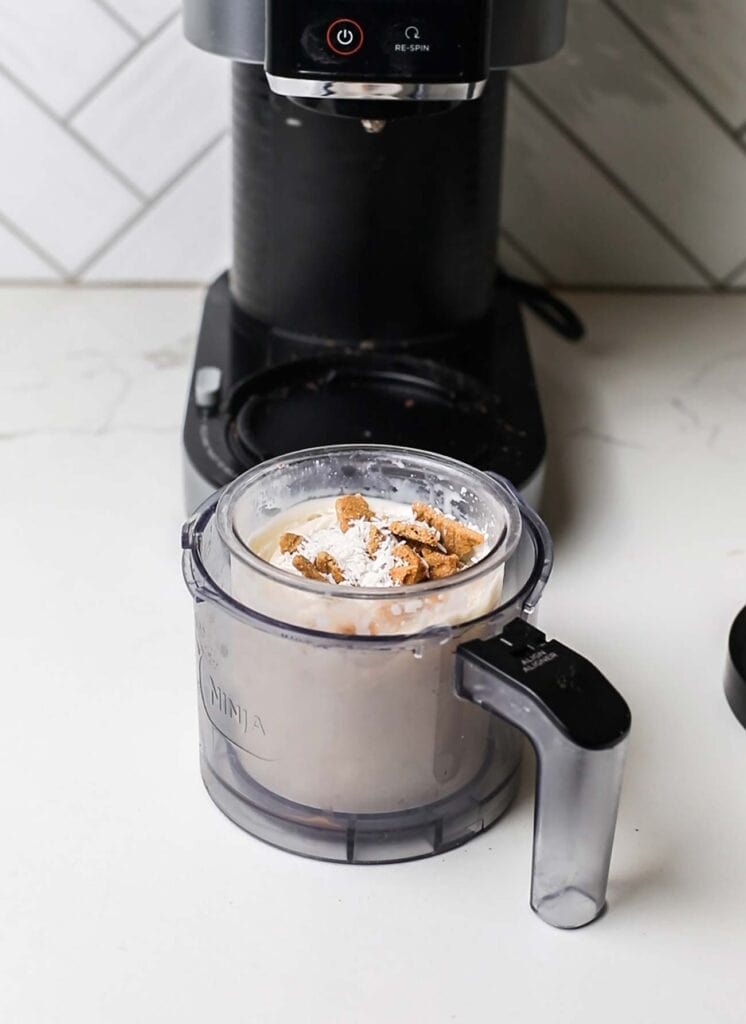
Step 4: If desired, add mix-ins to the pint, reattach the outer bowl lid with paddle, and place it in the Ninja Creami machine. Turn it on and run the “Mix-In” setting.
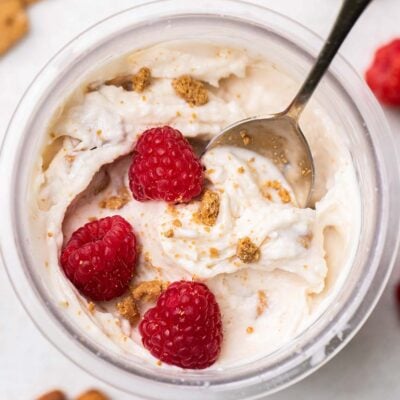
Step 5: Add your favorite toppings – I typically eat this right out of the pint!
Creami Ice Cream Tips & Tricks
Ice Cream Dry/Icy? No problem! Just pop it back in the machine and run the “respin” setting. Do not rerun the entire “Lite Ice Cream” setting. It will warm up the ice cream too much, resulting in a soft or milkshake-like texture.
Is your Protein Ice Cream too Soft? This is likely because you did not freeze your pints long enough. Allow them to fully freeze overnight. I always have extras in my outside freezer!
Didn’t finish your pint? I doubt this will happen often! But if it does, smooth the ice cream out into a flat/even surface, and then refreeze the pint overnight. When ready to enjoy, add it to the Creami Outer Bowl, attach it to the machine, and set to “respin”.
Creami Protein Ice Cream Variations
Experiment with different flavors to make this your favorite dessert.
Chocolate Creami Protein Ice Cream Recipe: Prefer a high protein chocolate ice cream? Add 1/4 cup of cacao powder to this recipe.
Sweetened & Flavored Protein Powders: If you have a favorite protein powder that’s sweetened and flavored, it’s fine to use in this recipe. Omit the allulose or start with a lower amount until you reach your desired sweetness. Protein powders are often sweeter than this recipe so you most likely will not need to add more.
Berry Creami Protein Ice Cream: Toss in 1 1/2 cups of blueberries, strawberries, or raspberries into this recipe, and reduce the milk to 1/2 cup. This makes an awesome blueberry protein ice cream or strawberry protein ice cream!
Banana Creami Protein Ice Cream: Add 1 large ripe banana and reduce the milk to 1/2 cup.
Peppermint Protein Ice Cream: Add 1/4 teaspoon of peppermint extract to the recipe. If desired, throw in a handful of spinach and blend well to give the ice cream a green tint.
Healthy Ice Cream Recipe Options
- Cherry Coconut Sorbet (this is made in a blender but would totally work in a Creami.)
- Healthy Breakfast Sundaes (use this vanilla protein ice cream in a breakfast sundae, or make the rapsberry ice cream in this recipe in your Creami!)
- Mint Chocolate Chip Smoothie (make this smoothie and freeze in a pint, reserving the dark chocolate for adding after blending the ice cream using the “mix-in” setting.)
I’d love to connect with you on social media! Find me on Facebook or Instagram where I post daily healthy eating and lifestyle inspiration!
Vanilla Ninja Creami Protein Ice Cream
Equipment
Ingredients
- 1 1/2 cups Greek yogurt plain/unsweetened (I use 2%, but any fat content will work)
- 1 cup almond milk unsweetened, or sub milk of choice
- 6 tablespoons allulose or 1/4 cup monk fruit/erythritol blend, maple syrup, or honey. Or sweetened to taste with your favorite sweetener. Omit if using a sweetened protein powder.
- 1 tablespoon cashew butter optional, gives ice cream an extra creamy texture
- 1 teaspoon vanilla extract
- 60 grams whey protein powder *use more or less depending on goals
- 10 grams collagen protein optional
Instructions
- Add all the ingredients into a blender, and process until the yogurt, cashew butter, and protein powders are fully incorporated.
- Divide the ice cream mixture between two Ninja Creami Pint containers. Add the lid and freeze the pints overnight. They may seem to be ready after 6-8 hours, but if you’d like a firmer textured ice cream (as opposed to a smoothie or milkshake texture), it really needs to fully freeze.
- Add the pint container to the Ninja Creami outer bowl, and securely attach the Outer Bowl Lid with the Creamerizer Paddle. Turn the machine and set to “Light Ice Cream.” If after running the ice cream looks icy/dry, do not run a full “Light Ice Cream” cycle again – instead, run it again with the “Respin” feature.
- If desired, add mix-ins to the pint, reattach the outer bowl lid with paddle, and run the “Mix-In” setting.
- Add desired toppings – I typically eat this right out of the pint!
- If the pint isn't finished, smooth the top into an even layer and refreeze. When ready to enjoy the rest, add it to the Ninja Creami outer bowl, and securely attach the Outer Bowl Lid with the Creamerizer Paddle. Turn the machine on and set to “Re-Spin.”
The perfect post-gym treat after a workout! We love topping this with bananas and raspberries
SO thick and creamy!